Process Basics
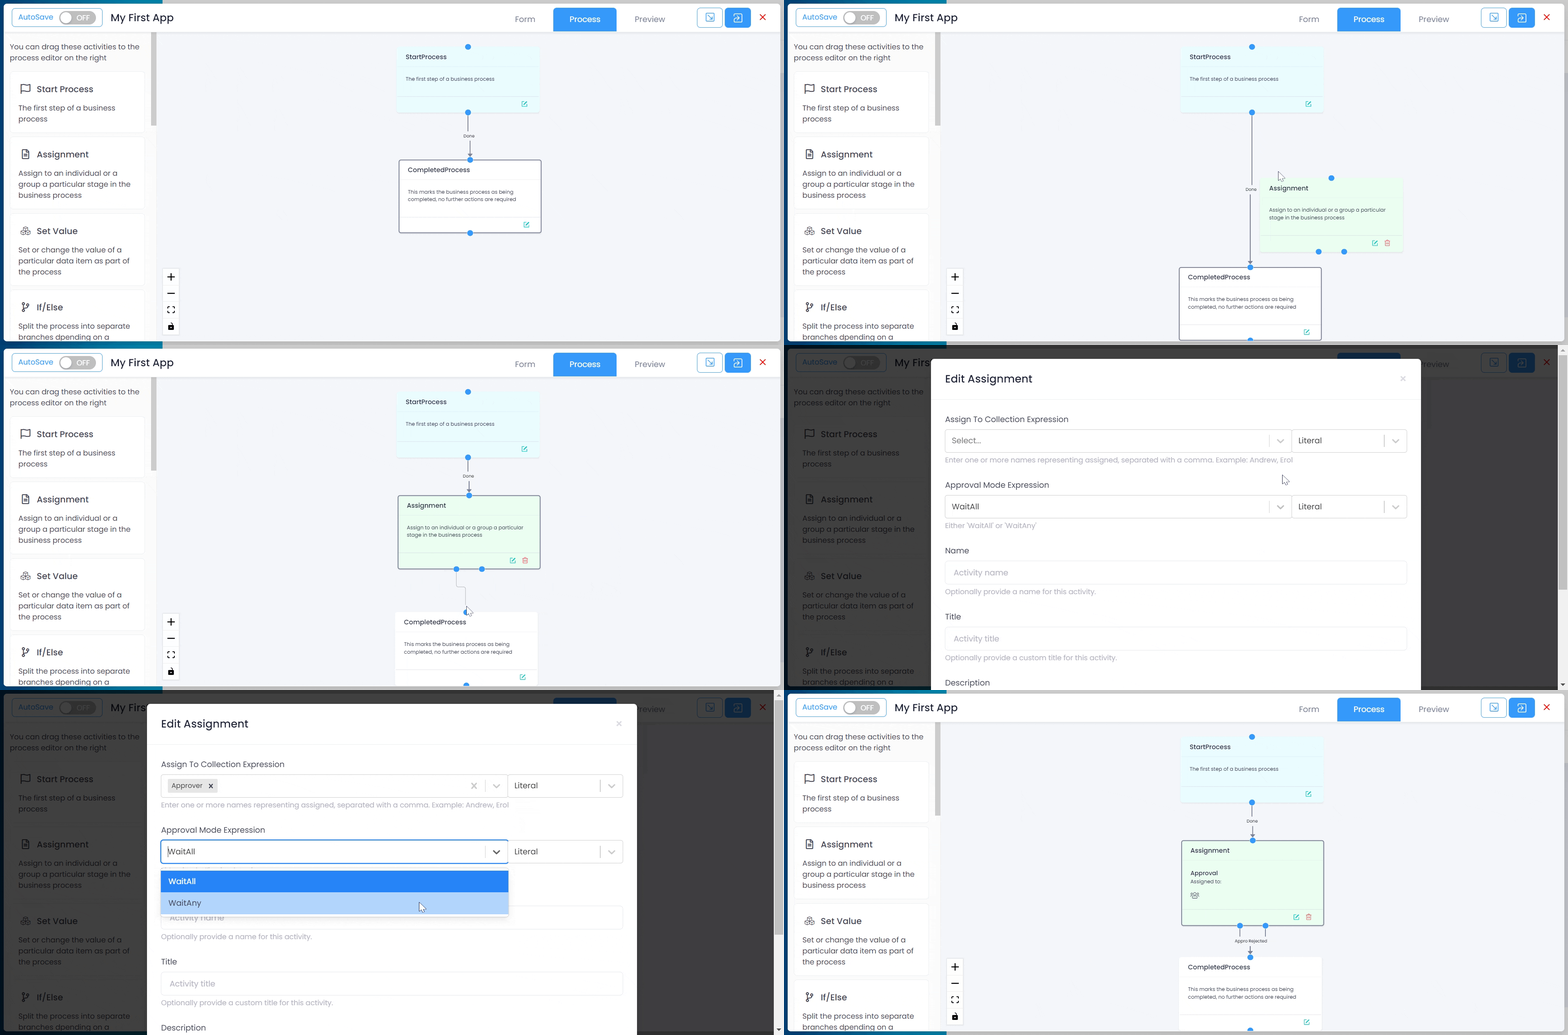
The second part of building an app is defining the process. This is accessed from within the app designer by clicking on the 'Process' tab at the top of the screen. When an app is first created, it will have two stages: 'Start Process' and 'Completed Process'. This may be all that is required, but in many scenarios a transaction will need to pass through several other stages which may include one or more approvals, as well as interactions with other systems such as sending data, interpreting reponses etc.
Each additional stage is added by dragging it from the list of possible options on the left of the process screen, and then linking to it by dragging the process lines around as necessary.

If you are moving existing process lines, put the mouse over where you are dragging it from until it turns in to a 4-way pointer. You can then drag and drop to its new destination.
To edit a step, click on the green 'edit' button at the bottom of the step you want to edit.
The Basic process steps are:
- Start process The first step, all processes must have a start.
- Assignment - Assigning a step to a user or group of users for approval.
- Complete Process - The end of the process. All process should have this as their final step.
However, in many cases the routing of an item will be more complex and require the process to take a different path depending on transaction values or other logic. The following routing steps are available to achieve this:
- Get Current Record - Get data from the current record to use in a later stage of the process.
- If/Else - Allow the process to follow a different direction depending on whether a condition is true or false.
- Fork - Allow a process to have two or more separate paths to follow.
- Join - Join a forked process back together.
More advanced process steps are:
- Send an HTTP Request - Send data to another system.
- Set Value - Set or change a value on the form automatically.
- Set Variable - Create a variable and assign it a value for later use in the process.
- Set Status - Set the status of a process, overriding the system status.
- Set Exception - Set an exception to indicate an error has occurred in the process.
These are explained in more detail in the following sections of this document.
All process steps have the following fields:
- Name - An optional name for the process. This is used when referring to this step in an expression so it's recommended all steps are given a name that includes only alphanumeric characters, and no spaces.
- Title - The title is used when showing the user what step the process is currently at, and in historical reports about who did each stage of a completed process and when.
- Description - Optional extra descriptive text about this step.